Ingredients
Why You’ll Love This Recipe
There’s so much to adore about making cheese at home. Here’s why this method is a game-changer:
- Cost-Effective : Save money by turning inexpensive milk into high-quality cheese.
- Quick and Easy : No complicated techniques or long wait times—this cheese is ready in minutes.
- Customizable : Adjust the flavor, texture, and type of cheese to suit your preferences.
- Fresh and Healthy : Skip preservatives and additives found in store-bought cheese.
- Impress Your Friends : Homemade cheese makes a thoughtful gift or a show-stopping addition to any meal.
Ingredients You’ll Need
The secret to this cheese lies in its simplicity. Here’s what you’ll need:
- 1 liter of whole milk (preferably fresh and full-fat for the best results)
- 1 tablespoon lemon juice (or vinegar as a substitute)
- 1/2 teaspoon salt (optional, for flavor)
Optional Add-Ins:
- Herbs and spices (e.g., black pepper, chili flakes, or dried herbs)
- Garlic powder or onion powder for a savory twist
- Honey or maple syrup for a sweet cheese variation
Step-by-Step Instructions
Ready to make your own cheese in just 5 minutes? Follow these easy steps:
Step 1: Heat the Milk
Pour the milk into a saucepan and heat it over medium heat. Stir occasionally to prevent the milk from sticking to the bottom. Heat the milk until it reaches 80–90°C (176–194°F) —just before it starts to boil. You’ll notice small bubbles forming around the edges.
Step 2: Add the Acid
Remove the saucepan from the heat and slowly stir in the lemon juice (or vinegar). As you mix, the milk will begin to curdle, separating into curds (solid parts) and whey (liquid parts). This process should take about 1–2 minutes .
Step 3: Strain the Curds
Line a colander with a cheesecloth or a clean kitchen towel and place it over a bowl to catch the whey. Pour the curdled milk mixture into the colander. Allow the curds to drain for a few minutes, depending on how firm you want your cheese to be.
Step 4: Season and Shape
Transfer the drained curds to a bowl. Add salt and any optional seasonings or flavorings. Mix gently to combine. If you want firmer cheese, press the curds into a mold or shape them into a ball using your hands.
Step 5: Enjoy or Store
Your cheese is ready to eat immediately! Spread it on bread, crumble it over salads, or use it in your favorite recipes. Store any leftovers in an airtight container in the refrigerator for up to 3–5 days .
Why This Recipe Works So Well
The magic of this cheese lies in the acid coagulation process. When you add lemon juice or vinegar to heated milk, the acid causes the proteins (casein) in the milk to denature and clump together, forming curds. The result is a soft, creamy cheese similar to paneer, ricotta, or farmer’s cheese. By skipping the aging process, you save time while still enjoying fresh, delicious cheese.
Variations to Try
While the basic recipe is divine, here are some creative ways to switch things up:
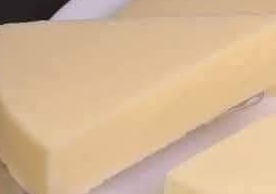
- Paneer : Press the curds firmly to create a firmer, sliceable cheese perfect for Indian dishes like saag paneer or tikka masala.
- Ricotta : Use slightly less acid and strain the curds briefly for a softer, creamier texture ideal for lasagna or desserts.
- Herbed Cheese : Mix in fresh herbs like basil, dill, or chives for a flavorful spread.
- Sweet Cheese : Add honey, cinnamon, or vanilla extract for a dessert-worthy treat.
- Flavored Variations : Experiment with smoked paprika, garlic, or jalapeños for a bold twist.
Tips for Success
- Use Fresh Milk : Fresh, full-fat milk yields the best texture and flavor. Avoid ultra-pasteurized milk if possible, as it may not curdle as well.
- Don’t Overheat the Milk : Heating the milk too quickly or letting it boil can affect the curdling process. Keep the temperature steady.
- Save the Whey : Don’t throw away the leftover whey! Use it in smoothies, soups, or baking for added nutrition.
- Experiment with Acids : Lemon juice gives a mild tang, while vinegar creates a sharper flavor. Try both to see which you prefer.
- Press for Firmness : For firmer cheese, wrap the curds in cheesecloth and press them under a heavy object (like a cast-iron skillet) for 1–2 hours.
Serving Suggestions
This homemade cheese is incredibly versatile and pairs well with a variety of dishes. Here are some ideas to enhance your experience:
- Breakfast Delight : Spread on toast with honey and nuts, or pair with fresh fruit for a wholesome start to your day.
- Salads and Wraps : Crumble over salads or stuff into wraps for added protein and flavor.
- Pasta Perfection : Use in lasagna, stuffed shells, or as a topping for pizza.
- Snack Time : Serve with crackers, olives, or charcuterie for a quick and elegant snack.
- Dessert Twist : Sweeten with honey or chocolate drizzle for a decadent treat.
Final Thoughts
With its simplicity, affordability, and endless customization options, homemade cheese is a must-try for anyone who loves cooking or wants to explore new culinary skills. Whether you’re looking to save money, reduce food waste, or simply enjoy the freshest cheese possible, this recipe delivers big on flavor and satisfaction.
So, the next time you’re tempted to buy cheese from the store, think again! With just one liter of milk and five minutes of your time, you can create something truly special. Trust us—it’s quick, easy, and absolutely delicious!
Have you tried making cheese at home yet? Share your thoughts, tips, and variations in the comments below. Happy cheesemaking!
Enjoy.